I’ve never thought twice about buying English muffins from the grocery store. For years I’ve opened that store-purchased bag, sliced one open, dropped it into the toaster, and been content with what popped out.

But the first time I looked through the Dahlia Bakery cookbook and saw pages of English muffins topped with ham and eggs, Hollandaise, and fruity jam, I wanted to try making them myself. This project required waiting for a Saturday that I could commit the time for all the steps involved with resting and proofing the dough, but let me tell you, it was worth the wait.
As suggested by the authors, I prepared the dough the first day, then shaped and baked the muffins the next day. I won’t lie; the shaping part turned out being pretty messy. When the instructions said to divide the dough into equal pieces, I reached for my food scale as I always do when making dinner or hamburger rolls. But that wasn’t going to happen. The dough was much too wet for that, and I couldn’t be tempted to add more flour. I used a bench scraper to finish dividing the dough, and they may not have all been the same size but I was okay with that.

When the muffins finished baking and I pulled them out of the oven, they actually looked like I hoped they would. I cut into one and saw the beautiful, craggy holes that are perfect for soaking up endless varieties of toppings. And then I took a bite. You know when you spend a decent amount of time on something, and it actually meets all your expectations? Yeah, that’s totally what happened.

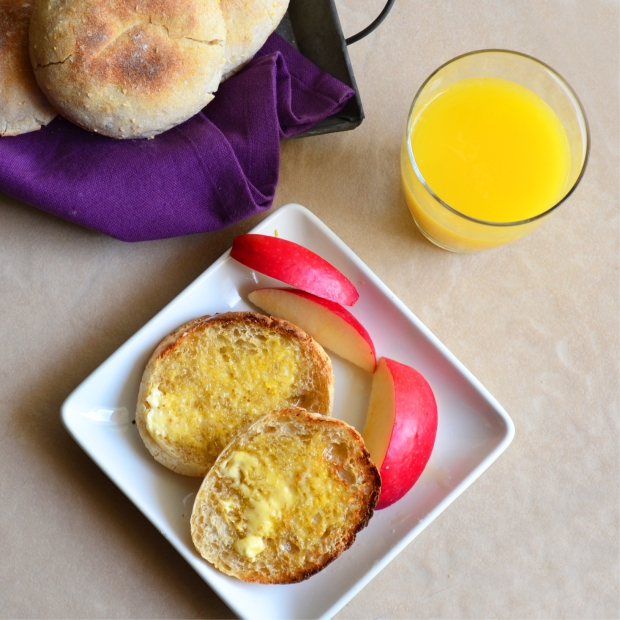
That first morning, we ate them as fancy-schmancy Eggs Benedict with Hollandaise sauce, and it was all very good. But the real treat was being able to pull an English muffin out of the freezer for the next many mornings. Most of them ended up being toasted and schmeared with peanut butter. Now that was good.
English Muffins
Makes 12
- 1 medium Yukon Gold potato
- First portion of water: 1 1/3 cups water, at or close to 68°F (cool tap water)
- 3 cups bread flour
- 1/4 cup whole wheat flour
- 1 tablespoon honey
- 2 1/2 teaspoons kosher salt
- 1 1/4 teaspoons active dry yeast
- Second portion of water: 1/3 cup water, 68°F
- Cooking spray for oiling the bowl
- 2 tablespoons all-purpose flour, plus more for dusting the work surface
- 2 tablespoons cornmeal
Cut the potato into 1-inch chunks without bothering to peel it. Put the chunks into a small saucepan and add enough cold water to cover. Bring the water to a boil and reduce to a simmer. Cook until the potato is tender, 8 to 10 minutes. Use a slotted spoon to transfer the potato to a small bowl and discard the water. Mash the potato, skin and all, with a masher or fork. Measure and keep a well-packed half-cup of potato, and discard or eat the rest. Place the mashed potato in the fridge to cool. Once it is completely cool, start the dough.
Use a thermometer to check the first portion of water. It should be at or close to 68°F. Pour it into a stand mixer fitted with the paddle attachment. Add both flours, the cooled mashed potato, honey, salt, and yeast. Mix on low speed for about 10 minutes. The dough should be sticky, stretchy, and wrap around the paddle. Turn off the mixer and scrape down the dough. Let the dough rest where it is for 5 minutes. During this time, prepare a large mixing bowl with cooking spray.
Turn the mixer to medium speed and mix the dough for about 2 minutes. By then, the dough will be tighter and stronger and be wound around the paddle. Test the temperature of the second portion of water; it should be at or close to 68°F. With the mixer on low speed, begin adding the water 2 tablespoons at a time. Make sure each addition of water is absorbed before adding the next one. After it’s all added, mix the dough for another 2 minutes. At this point, the dough will be smooth and shiny. Test the temperature of the dough. It should be between 75°F and 80°F. If it’s too cool, set in a warm place for a short bit. If it’s too warm, set it in a cool spot for a short bit.
Dump the dough into the prepared bowl and flip it over inside the bowl so it’s coated with the cooking spray. Cover with plastic wrap and let it rest on a counter for 30 minutes. After it rests, it’s time to turn the dough. After uncovering the bowl, rub some oil or cooking spray on your hands because the dough will be very sticky. Reach over the bowl to the side farthest from you, grab the dough from the bottom of the bowl, and pull it straight up. Stretch it up as far as you can without letting it break, and drop the dough while folding it over towards you. Turn the bowl 90 degrees and repeat for a total of 4 turns.
Flip the dough over, cover it again with plastic wrap, and let it rest for another 30 minutes. Again, turn the dough as before with oiled hands for a total of 4 turns. Cover and let it rest another 60 minutes. This will be a total resting time of 2 hours. The dough will be sticky and active, so good things are to come.
If you are planning to shape and bake the muffins the next day, you can leave the plastic wrap on the bowl at this point and put it in the fridge overnight. Also, if you’re planning to finish all in one day but need to stop for a while, you can refrigerate at this point for an hour or more.
When you are ready to shape and bake the English muffins, combine the 2 tablespoons flour and 2 tablespoons cornmeal in a small bowl. Line two baking sheets with parchment paper and dust them with the flour-cornmeal mixture. Set the pans aside.
Generously flour a work surface and dump the sticky dough onto it. Using a floured metal bench scraper or floured knife, cut the dough into 12 sort of equal pieces. Just do your best. To shape each muffin, place a portion of the dough onto the floured surface and pull the dough up and over itself. You’re trying to roughly fold the dough in half. Flip the dough over so the floured side is facing up and set it down on an unfloured surface. Cup the palm of your hand over the dough and roll it firmly in place between your hand and the work surface into a round shape. Alternatively, you can roll each portion between the palms of both floured hands instead of using the work surface. It really is okay if the muffins don’t all look the same because they will still be delicious.
Place 6 English muffins, evenly spaced, on each baking. Cover with clean kitchen towels and set aside on a counter until they have doubled in size. If the dough hasn’t been refrigerated, this will take 1 hour to 1 hour and forty-five minutes. If it has been refrigerated, it should take about 2 hours to 2 ½ hours.
When the English muffins have doubled in size, they will feel less sticky, and when gently pressed, feel light and airy. You may also see some bubbles. Meanwhile, preheat the oven to 425° F. We are so close.
Place the pans on the middle rack in the oven and bake for 8 minutes. Remove the pan and flip each muffin over. Use your hand or a light spatula to give each muffin a firm pat to slightly flatten. Rotate the pans and return them to the oven, switching between racks. Bake until the muffins are golden with a few brown spots, about 8 minutes more, for a total of 16 minutes baking time.
Remove the pans from the oven and carefully transfer the muffins to a wire rack to cool about 30 minutes. Finally, slice a muffin in half and toast. Top with whatever you choose, and enjoy.
Recipe from The Dahlia Bakery Cookbook: Sweetness in Seattle


Those do like perfect little English muffins, especially when you cut into them and can see the holes. I love English muffins. 🙂
Thanks! I was pleasantly surprised at how much I liked them.